How to Create a Panorama with Photoshop and Photomerge - by Darren Rowse
Submitted by Matt Dawdy from www.TheRightPic.com. 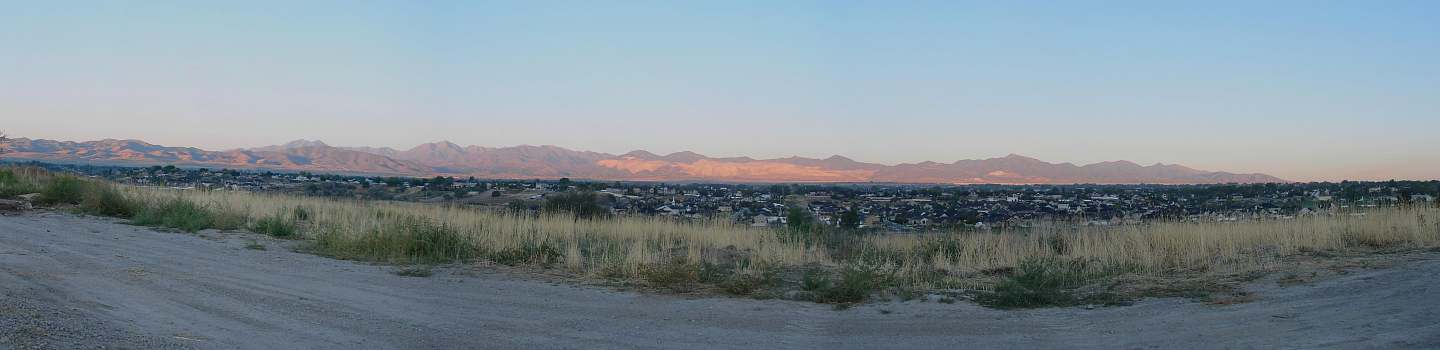
A panorama is simply a wide-angled view of a
physical space. To the photographer a panorama is usually several photographs
that are stitched together horizontally to create a seamless picture.
This is going to be a pretty simple tutorial in
which we create a panorama using Photoshop’s Photomerge utility.
Here are the tools I am going to use to create
panoramic photos:
1. A digital camera
2. A tripod or a stable surface or platform to take pictures from that allows some horizontal rotation
3. A computer and Adobe Photoshop and the Photomerge utility
2. A tripod or a stable surface or platform to take pictures from that allows some horizontal rotation
3. A computer and Adobe Photoshop and the Photomerge utility
When I started thinking about this tutorial I began
to wonder what I should shoot. Just about any subject can be used for a
panorama, however traditional panoramic photography subjects are typically
landscapes or city skylines. I will show you a few different panoramas that I
created, some typical, some a little different than what you would normally see
for a panorama.
Setting up for your shoot:
A stable position to take your panoramas from is
important. Isn’t it always when taking pictures? Well, with panoramas it is
more important because the Photoshop process that joins your photos together is
good at what it does but it is not perfect and when it has trouble putting the
individual pictures together it either leaves ragged white lines in between the
photos or chops large sections out of the photos because it doesn’t know what
to do with them.
I would recommend you use a tripod since it allows
you to turn your camera slightly in order to take successive shots. If you
can’t use a tripod some sort of flat surface like the top of a wall, fence or a
board may work as long as it is possible to take a picture and then rotate your
camera slightly and then take another picture without vertical movement.
Once you find your potential spot and set your
camera up, rotate it to the extreme right and left edges that you want to
include in your photo and make sure that there isn’t anything that is too big
of a visual or physical obstruction. Something else to keep in mind is to try
to set up so that the full range of your shot does not show shadows from you or
your camera.
The actual shoot:
For the panoramic pictures I take I start at the
extreme left of what I want to capture, set my timer and take bracketed
exposure shots. I then stop and check the photos without moving the camera. If
one of them looks OK I am ready to continue. If not, I adjust my settings and
shoot again from the same spot.
When you have the settings you want and have taken
your extreme left pictures it is time to grab a reference point in the viewfinder
about 20%-30% away from the right side of your viewfinder. You do this because
you are going to swivel the camera so that this reference point is at the far
left but still in the viewfinder so that there is some overlap between your
photos.

The green arrows show my chosen reference point,
which is a point that I will use to make sure I don’t swivel too far to the
right and leave a gap in between my two pictures. The dotted line represents
the overlap that I am going to have between this and my next picture. The
second picture is shown diagonally lower than the other one for display
purposes only.
As far as overlap is concerned, you are shooting
digitally so snap away, overlap 30-50% if you want, but err on the side of
overlapping too much. If you don’t overlap enough, as Photoshop’s Photomerge
app attempts to blend the shots it will not have enough of a fingerprint to
blend well and your panorama will end up with the ragged white lines that I
wrote about earlier or look like Frankenstein’s version of a panorama.
Once you mentally choose a reference point such as
a tree or prominent peak swivel the camera to the right until your reference
point is almost at the left edge of the viewfinder. Try not to move the camera
position, vertical pitch or height. Once you have swiveled far enough repeat
the process that you did to take the first picture.
Now simply repeat this process until you come to
the extreme right end of your desired panoramic shot:
1. Choose a reference point about 20-30% away from
the right edge of the viewfinder
2. Swivel the camera to the right until your reference point is at the left edge of the viewfinder
3. Take the picture
4. Repeat until you have taken photos that cover the entire area you wish to capture in your panorama
2. Swivel the camera to the right until your reference point is at the left edge of the viewfinder
3. Take the picture
4. Repeat until you have taken photos that cover the entire area you wish to capture in your panorama
Make your panorama:
Now you are ready to ‘stitch’ your photos together.
1. Open each photo that you wish to add to the
panorama in Photoshop. Open them sequentially, starting with the leftmost one
first.
2. In Photoshop CS3 (or CS2, not sure about other versions) go to File > Automate > Photomerge
3. In the dialog that appears choose Auto and then click the “Add Open Files” button
4. Check the filename numbers of the photos that are added, assuming you allow your camera to number your photos. If you started off shooting from the left of the panorama the lower numbers should be at the top. In other words, it should read something like this:

If the filenames are out of order remove all of the
ones that are before the one that should be first. Now just click Add Open
Files again and it will add the pictures back in. Keep removing files and
adding them back until you have your files in order.
Click OK. Now Photoshop goes into action. It
analyzes and blends the photos. This could take several minutes. Once it is
finished you will see what Photoshop and Photomerge could make out of your
photos.

Here is my neighbor’s fish tank. A lot of it got
lost in the Photomerge process, in fact I would guess that I lost about 50% of
my picture material which is probably due to the fact that the images are dark
and very similar and Photomerge probably had a difficult time piecing it
together. Still, the picture isn’t a total loss. One thing that did happen that
is common with Photomerged pictures is that it is on a slight tilt to the left.
If this happens to you, first flatten your image
and then do an Arbitrary rotation until the picture looks level.
Next, crop the picture. If you are unfamiliar with
how to do this just press C. Click and drag a box over the area of the picture
you want to keep. Press ENTER and the rest of the photo will be gone.
Next, you might want to adjust your saturation,
exposure, hue levels, etc, until you are happy with the photo. Make sure you
zoom in all of the way to 100% and look the photo over, zoom back out and move
around. Look for obvious problems with the picture.
As for me, I have a fishtank with a couple of
blurry fish but a decent looking photo that ends up being 88″ wide by 23″ long,
give or take a little.
When you are done playing with the coloring and
exposure do a Smart Sharpen by going to Filter > Sharpen > Smart Sharpen.
I would set the Amount to 60% and set the Radius to 1.0. Click OK.
Go ahead and save your picture and you have a
panorama! Here is mine with the default Photoshop frame action added (the photo
has been shortened and saved at a low res to make it more web palatable) (click
to enlarge the following image):

Given time I would add a couple of good looking
fish from other photos and clean up some of the rough spots, but this is a good
start.
Here are a couple of other panoramas that I took
(click to enlarge):
A field near where I work. The actual panorama is 204″
x 24″.

Here are some homes and a range of mountains with
the waste from a giant copper mine. Actual panorama is 94″ x 23″
Matt Dawdy is one of the contributors and a blogger
for the free stock photography site, www.TheRightPic.com
BACKGROUND:
Darren Rowse is
the editor and founder of Digital Photography School and SnapnDeals. He lives in Melbourne Australia and is also
the editor of the ProBlogger Blog Tips.
No comments:
Post a Comment