Using photograph taken in first round of my photography for Alice Theme:

This is the chosen image, although I accidently closed the file without tkaing screenshots of the process I took, it's fairly similar to the processes of the others:
- Open file in Photoshop
- Duplicate layer
- Crop
- Adjustment Layer Levels
- Select tiles - Adjustment Layer Vibrance and Saturation
- Select top right corner - Adjustment Layer Levels (remove white reflection and crease)
- Edit Adjustment Layer Levels to darken
- Duplicate layer, convert to Smart Filter and Sharpen (smart sharpen)
Further Editing:

Select top right corner:

Adjustment Layer Levels:

Feather edges using Masks Layer
Select eyes: and Adjustment Layer Levels
Select eyes: and Adjustment Layer Levels


Continue editing Adjustment Layer Levels


Edit Adjustment Layer Levels of top right corner layer:


Copy tooth and paste: use as apostrohe (we're all made here)
Free Transform:

Adjustment Layer Levels of tooth apostrphe:

Editing Adjustment Layer Levels:

Edit Adjustment Layer Levels of top right corner layer:

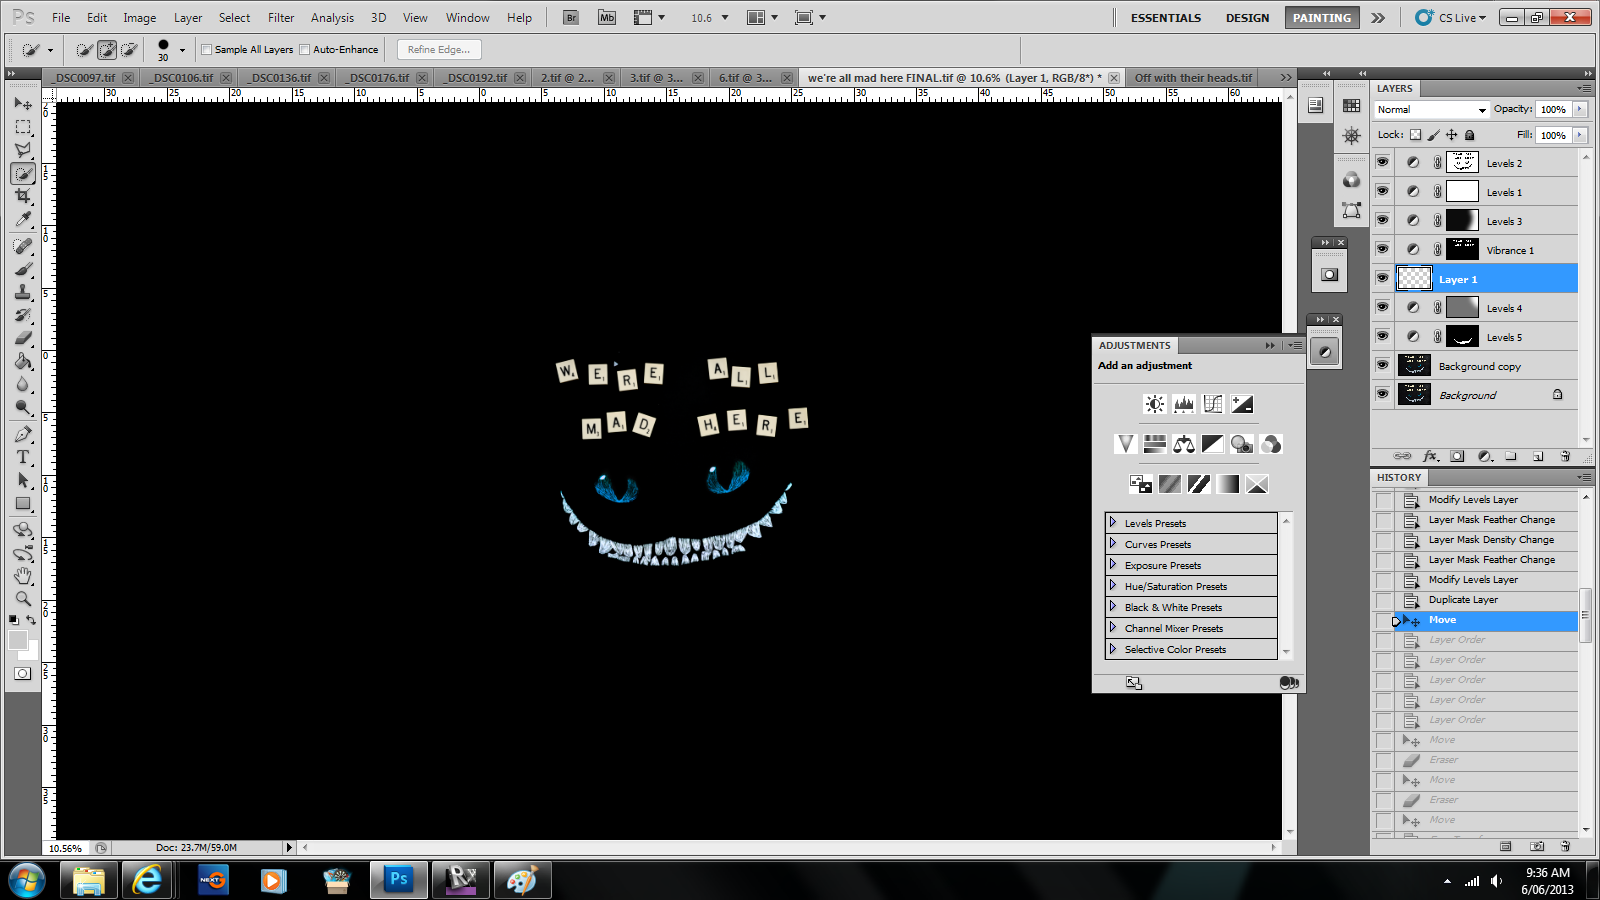
Although this image is dark, in comparison to the other backgrounds of all my other images, I love it! The Cheshire Cat comes out of no where in the movie and pops up when he feels like it, so I think the black brings out this aspect! The cotnrast also makes his smiling and cheeky teeth stand out more, which is the main idea behind this image! I love it, it's simple and quirky!
No comments:
Post a Comment