Week 5: Panorama demonstration; outdoor shoot; stitching principles & techniques; ‘the happy accident’
Stitching For Panorama:
Using Prospect Hill.tif:
File, Automate, Photomerge:
Merge Layers:
Crop:
Or: Use Magic Wand Tool:
Click on the transparent section, edit, fill:
Obviously there will be spots that don't line up or don't stitch:
Final Image:
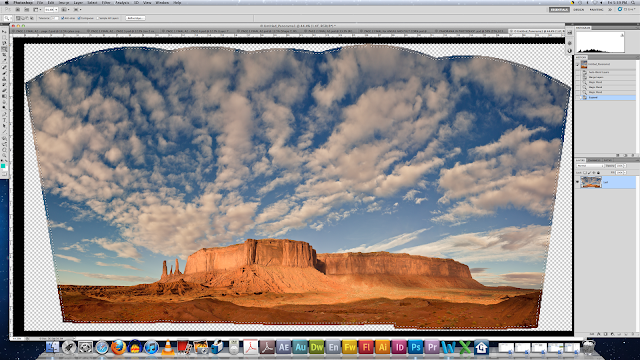
Using Arizona.tif:
File, Automate, Photomerge:
Magic wand tool:
Select, modify, expand:

Experiment ie. 10:
Continue experimenting:
Right hand corner, to the bottom, it has repeated the spiky parts of the landscape in the far right ( technology isn't prefect):
Final Image:
360o
Using Park_Panorama.tif:
Open File:
Image, image size
untick constrain proportions
make height and width the same:
untick constrain proportions
make height and width the same:
THEN:
- Healing brush tool (7th down)
- Hold option key and heal
Final Image: (unfinished, needs healing brush tool)
These techniques for stitching together panoramas are awesome!! I assumed we'd have to sit there and put them all together ourselves! Technology is a wonderful thing, and it's great to experiment with the results from the Photomerge! It saves you time rather than doing it yourself, so you can get on with the editing and other skills used to enhance the photograph.


No comments:
Post a Comment