Sunday, 24 March 2013

Film Vs. Digital


"Film: TMAX 400 @ ISO1600
Processed in HC110 (1:31)
Pentax 6x7, 105/f2.4


Digital: Nikon D700, ISO2000
50/1.4D (shot at f2.2)


I don't usually carry my digital camera to shoots with me but on this occasion I decided to do a comparison. For this shot I was right up against a wall (small room) so I couldn't match the subject size in the frame. These are both uncropped images. The digital is the embedded JPG from the RAW file, untouched."

Information and Image Source: http://www.flickr.com/photos/bossnas/8215554090/in/photostream/


I think both images have their own strengths and good qulaities about them. The highlights in digital photograph are more vibrant and obious but there is a strong contrast. Film has more even spread of tones in black and white. The background is a good example to use for this comparison. There is a difference between the detail in the curtain and textures in the film to that on the right (digital) which is barely visible.
Personally I prefer digital media because I can see what I have taken a photograph of, review and retake if neceesary, whereas film makes it harder to do so (longer process).
That being said, film photographs have particular qualities about them which make them unique, such as the greater range of mid tones.

Friday, 22 March 2013

Assignment 2: Exercise 10


Exercise 9: Colour/Contrast & Vignette


Match the raw file (before) with the jpeg file (after) using the Basic, Tone Curves and HSL adjustments.


Using farmer_dog_before.NEF:
Exposure when image was taken: 3.05


Compare to: farmer_dog_after.JPG


I was not happy with the results of the editing I had done for this image, and decided to redo the work from scratch. I didn't think it was a close enough 'match' or looked similar in tones, colours, highlights, shadows etc. 


I continued to edit and adjust this image on Photoshop until I was happier with the image I had.


Final Image Submission:


My image isn't that close to the one we are supposed to 'match' but I am still pretty happy with how it turned out! I learnt how to create a vignette and adjust all the different levels, exposures, contrasts, hues and saturations, all in one image. I like this photograph and I think it is still effective in portraying the subject matter even though it's not and exact match of the example. It is it's own work of art despite being compared to the other image.

Assignment 2: Exercise 9

Exercise 9: Black and White 

Convert both images to black and white using image>adjustments>black and white tool to create tonally balanced and dramatic images.


Using IMG_0224.JPG:

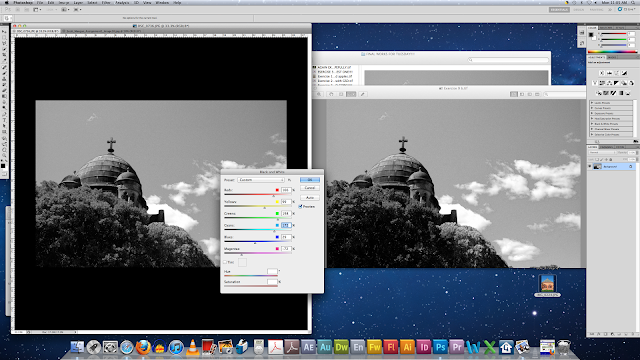
Edit, Adjustments, Black and White...

Final Image Submission:


Using DSC_0736.JPG:

Edit, Adjustments, Black and White...


Final Image Submission:

Assignment 2: Exercise 8


Exercise 8: Lens Correction

Correct the lens distortion and remoce the vignette on both images using the Lens Correction Filter

  • Architecture deals with straight lines
  • Photography deals with 'not-straight' lines
  • Bend and warps when you psotion yourself relative to the object


Lens Correction:

  • 1st way: Filter, Lens Correction, Own Interface
  • 2nd way: Edit, Transform, Perspective  


Using: DSC_0730.JPG 


Filter, Lens Correction...:


Edit, Free Transform, Perspective:


Final Image Submission:


Using: DSC_0732.JPG 


Filter, Lens Correction...:

Edit, Free Transform, Perspective:


Final Image Submission:


These two tools to adjust the lens distortion are clever because you can make changes to a photo even if it's just not quite right. CJ said that lens distortion is predominant in architectural photography, which is annoying because that's the course I am studying and want to pursue photography for that subject matter. But now at least I know how to fix it...