- Painting & Spotting Vs. Surface Blur
- Lightening using Layer Masks
- Highlighting facial features
- Wacom tablets
- Perceptions of reality
- Hyper-reality
- Highlights on human face: nose, chin, lips etc.
- In this exercise think about people as objects
Using bored_student.tif:
- Skin unwrinkled + young but is untouched, discolouration, under the eyes, skin imperfection, blemishes, freckles
- Photograph has shallow depth of field
- Created obvious hairs on her chin
- Looking at working destructive + nondestructive
Smart objects:

Open file
 Duplicate layer
 Convert smart object

Filter blur 2.5


Creates smart mask

Invert (mask invert)
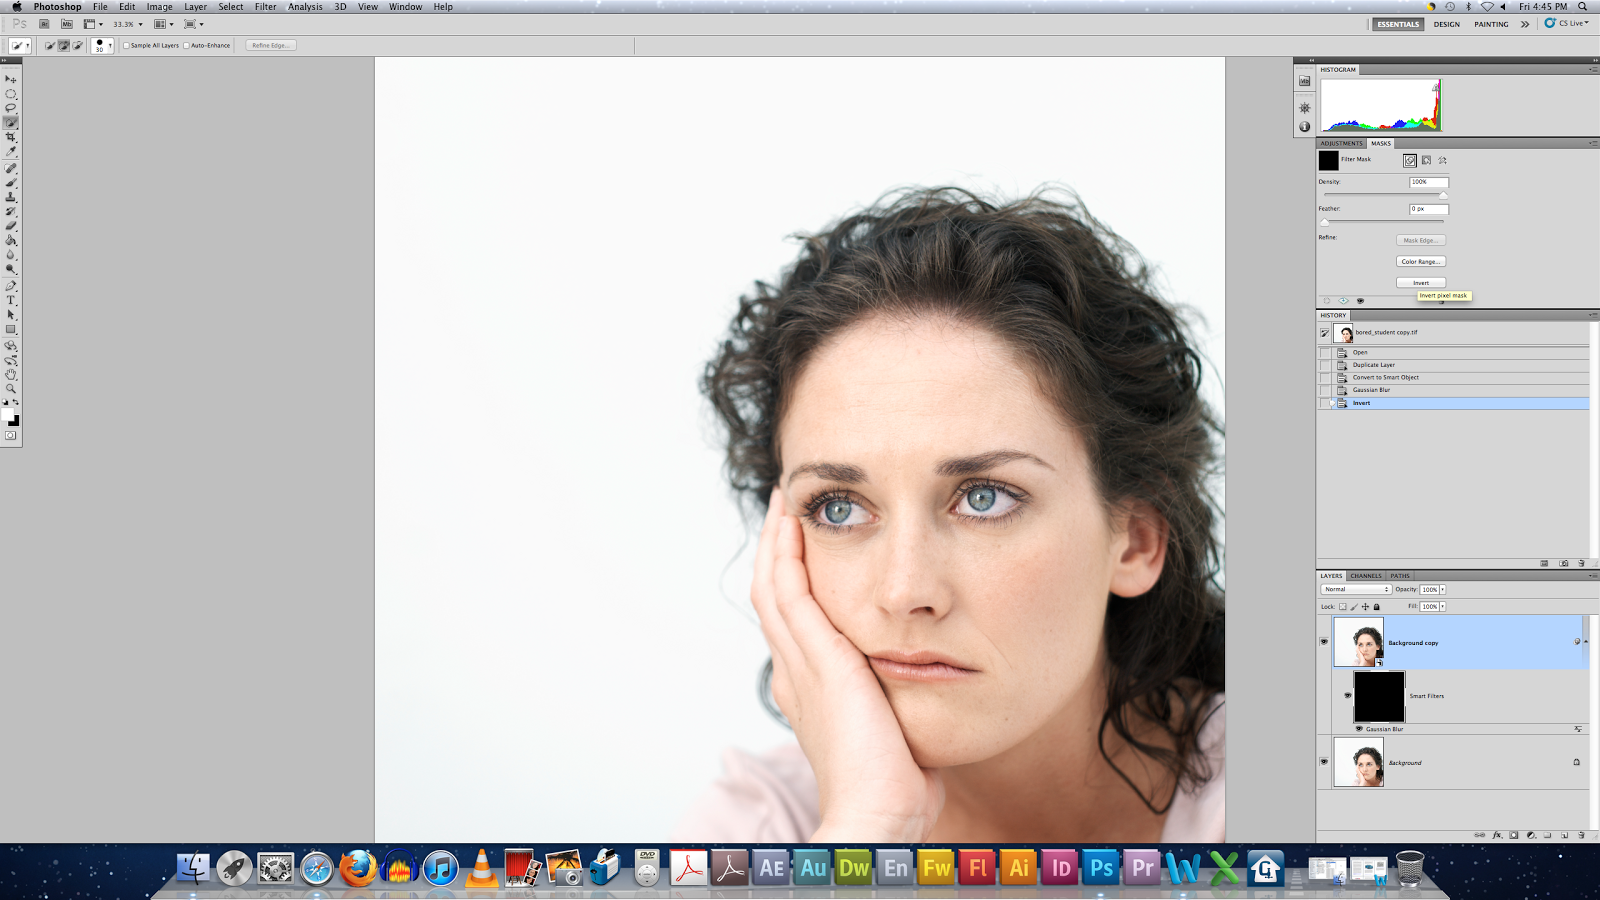
Use brush tool under eyes + dimples + forehead

Adjust density

Update blue to 5.0
Use grey brush to have less blur, with paintbrush
Paint in monochrome
There is a highlight down her nose
New blank layer

Make white the foreground

Filter, Gaussian Blur:


Brush down her nose

Play with overlay: Soft light for example
New layer
Brush over lips


Repeat as above
Use (i) eye dropper
Editing her face and skin to smooth it over:


Filter, liquify:


I think the girl looked way better before! I now have a greater respect for people who do edit photographs and Photoshop photographs. It's really hard! I made her look worse not better!!
TIP: Comma and option shift e (Change Brush Size)
Using the tool LIQUIFY:
Using Image: Stout Chef


Filter, liquify:


There is a highlight down her nose
New blank layer

Make white the foreground

Filter, Gaussian Blur:


Brush down her nose

Play with overlay: Soft light for example
New layer
Brush over lips


Repeat as above
Use (i) eye dropper
Editing her face and skin to smooth it over:


Repeat as above: to edit her eye (make her eye ball whiter):


Filter, liquify:


I think the girl looked way better before! I now have a greater respect for people who do edit photographs and Photoshop photographs. It's really hard! I made her look worse not better!!
TIP: Comma and option shift e (Change Brush Size)
Using the tool LIQUIFY:
Using Image: Stout Chef


Filter, liquify:


Bee didnt notice that I had used the liquified tool on this stout so I think I need to do a bit more work on this chef. But I understand how to use this tool, it's really handy and clever!
No comments:
Post a Comment